


Your blush brush matters more than most people realize—especially if your goal is a flawless, professional-looking finish. In Your Blush Brush Matters: Celebrity Makeup Artist Tips for Perfect Application, experts agree that the right brush can completely transform how blush blends, diffuses, and enhances your natural bone structure. From achieving a soft, airbrushed glow to precise sculpting on the cheeks, brush shape, density, and bristle type all play a critical role in the final result.
Table Of Content
- The Dome Brush: Your Secret for a Sculpted, Diffused Look
- What Type of Blush Works Best with This Shape?
- How to Apply for a Soft, Diffused Look
- Master Placement for a Believable Glow
- The Angled Brush: Sculpt & Define
- Defining and Lifting the Cheekbones: Step-by-Step
- Why This Shape Excels with Powder and Cream
- Avoiding Harsh Lines: The Blending Technique
- Question-Answer
- I have a small, round blush brush that came with a set. Is it okay to use, or do I really need a different shape?
- My blush always looks too streaky or harsh. Could the brush be the problem?
- What’s the actual difference between a cheap drugstore blush brush and a more expensive one? Is the price worth it?
- I use cream blush. Do I need a special brush, or can I use my fingers?
- How do I clean my blush brush, and how often should I do it?
- I have a small, flat brush that came with my blush. Is it okay to use, or should I invest in a different one?
- Match brush shape and bristle type to your blush formula for seamless application and true color payoff.
- Use gentle, circular or stippling motions and build color in thin layers to avoid harsh, streaky lines.
- Invest in a few quality brushes and clean them weekly to maintain performance and a polished, professional finish.
Celebrity makeup artists emphasize that even the best blush formulas can look patchy or harsh when paired with the wrong tool. A well-chosen blush brush ensures seamless color payoff, better control, and longer-lasting wear—whether you prefer a subtle flush or a bold, editorial look. In this guide, you’ll discover how professionals select their brushes, the mistakes to avoid, and how small upgrades to your makeup tools can elevate your entire routine with minimal effort.

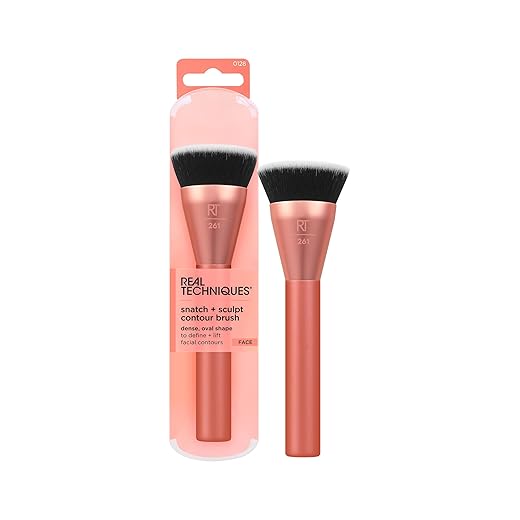
Start with a denser, shorter-bristled brush for powder formulas. This shape packs product onto the cheeks with precision, creating a vibrant, defined look. For cream and liquid blushes, however, a stippling brush with synthetic bristles or a slightly damp beauty sponge is non-negotiable. These tools sheer out the product for a seamless, skin-like layer, avoiding the streaky application that comes from using the wrong tool. The Real Techniques Stippling Brush is a prime example, ideal for blending cream formulas without disturbing foundation underneath.

Product consistency dictates brush choice more than personal preference. Vincent Oquendo, a renowned pro, emphasizes that technique matters, but the right brush unlocks a product’s benefit. A fluffy, angled brush is perfect for contouring and sculpting because its shape follows the cheek’s natural hollow. For a diffused, airbrushed effect with powder blushes, a large, dome-shaped brush with soft bristles in a circular motion works best. Consider the Sigma Beauty F80 Flat Kabuki for flawless foundation or cream blush application; its dense, flat top buffs product into the skin.

There is no single perfect brush for every formula. The goal is to create a certain flush, whether bold or barely-there. Using a dense brush with a cream product often results in a harsh, patchy look. Conversely, applying a finely-milled powder with a too-fluffy brush offers little color payoff. This is why investing in different brushes for different products is crucial. The e.l.f. Cosmetics Ultimate Blending Brush is a versatile, affordable option for blending multiple products, from highlighter to a soft layer of blush.

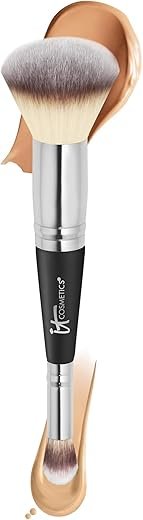
Ultimately, mastering application comes down to pairing. A stiff, flat concealer brush can precisely apply cream blush for graphic looks, while a tapered brush excels at placing highlighter on the cheekbones. Byrdie beauty experts agree: the right tool elevates makeup from good to exceptional. It’s not about having the most brushes, but the right ones–like the Morphe M439 Deluxe Buffer Brush for foundation or the IT Cosmetics Heavenly Luxe Complexion Perfection Brush #7 for a polished, airbrushed finish with any powder product.
The Dome Brush: Your Secret for a Sculpted, Diffused Look
Reach for a dome-shaped brush when you want a soft, blended application without harsh lines. This shape’s shorter, densely packed bristles excel at depositing product precisely and then seamlessly buffing it out.
The key benefit of this brush lies in its versatility. The rounded top allows for targeted application, while the fuller body enables quick blending. Use it for:
- Powder Formulas: It’s ideal for pigmented powders because the density picks up product effectively, but the dome shape prevents over-application.
- Cream Blush: The synthetic bristles in brushes like the Real Techniques Sculpting Brush are perfect for stippling cream formulas onto the apples of your cheeks.
- Highlighter: Use the very tips of the bristles to apply highlighter to the cheekbones for a controlled, intense glow.
Your technique matters. For a natural look, tap the brush into your product, then apply using circular motions. For more definition, use the brush’s tapered edge to layer color along the cheekbones. A pro tip from artists like Vincent Ford featured on Byrdie is to hang this brush with bristles facing down to preserve its form.
When you choose a dome brush, consider the density. A denser brush, like the Sigma F10 Powder/Blush Brush, offers more pigment payoff. A less dense one gives a sheerer wash of color. There is no single best brush; it comes down to the product you’re applying and the look you’re after. However, this one shape can handle many different tasks, saving you time and simplifying your kit.
What Type of Blush Works Best with This Shape?
Match powder formulations with fluffy, dome-shaped brushes and cream or liquid products with dense, flat-top shapes. The benefit is precise placement and seamless blending every time.
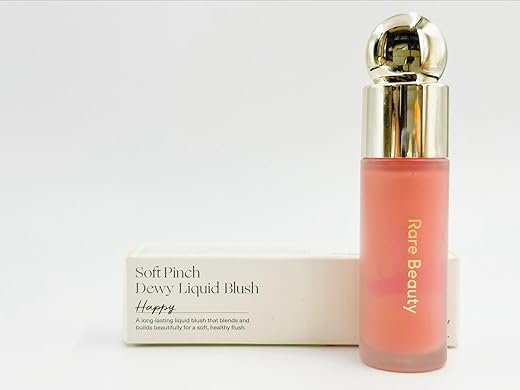
For a lifted effect on round cheeks, a tapered brush like the Sigma F10 applies powder blushes in an upward motion toward temples. Use a stippling technique with a synthetic brush, such as the Real Techniques Blush Brush, for cream products like the Rare Beauty Soft Pinch Liquid Blush to create a natural flush without disturbing base makeup.
Angular or elongated faces hang on a different rule. Apply blush directly to the apples in a circular motion to add width. A versatile brush like the e.l.f. Cosmetics Ultimate Blending Brush works for both powder and cream in this shape.
Whether you’re contouring or seeking a sheer wash of color, the formula dictates the tool. Dense, short bristles grab cream textures, while longer, airy ones diffuse powder perfectly. However, a multi-tasking dome brush can blend a powder highlighter above the blush for a seamless finish.
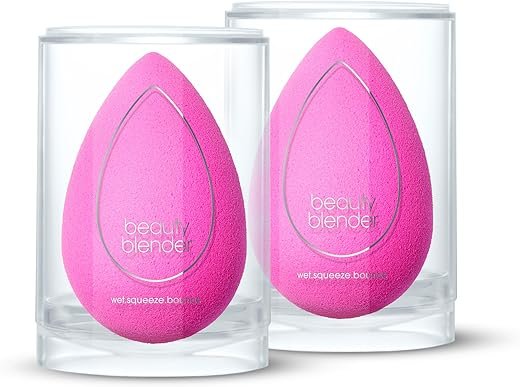
Pro tip from Vincent: For mature skin, a cream blush applied with fingers, then blended with a damp Beautyblender, often yields a more youthful result than powder. The right combo makes all the matter. Choose certain tools for certain textures–that’s the secret makeup pros love.
How to Apply for a Soft, Diffused Look
Start with a shorter, dense brush for cream blushes, like the Real Techniques Stippling Brush. The key is the motion: use a gentle stippling or tapping application to layer product without disturbing your base. Apply to the apples of your cheeks and blend upward towards your temples.
For powders, a fluffy, tapered brush like the Sigma F40 Large Angled Contour is ideal. Use light, circular buffing motions to create a seamless hang. It doesn’t matter whether you choose matte or shimmer products; this technique ensures a soft finish. The benefit comes from using a clean brush for the final blend, diffusing any harsh lines.

To intensify color, build in thin layers. However, if youre going for a bold look, start with a different approach: place pigment higher on the cheekbones and blend outwards. Many pros love the Rare Beauty Soft Pinch Liquid Blush for this; its highly pigmented, so one dot is often enough. Blend immediately with your fingertips or a damp sponge for the most natural, skin-like result without patchiness.
Master Placement for a Believable Glow
Focus on the apples of your cheeks, blending upward along the cheekbones toward the temples. This upward motion lifts the face and creates a natural, flushed effect, as if you’ve just come indoors. Avoid placing color too low, as this can create a dragging effect.
For a lifted look, concentrate application higher on the cheekbones, almost merging with your highlighter. Use shorter, controlled bristles, like those on the Real Techniques Blush Brush, for precise placement before diffusing. The density of this brush matters because it offers more control than a fluffy dome shape.
Different formulas demand certain techniques. With cream blushes, apply directly after foundation but before powder. Use a stippling technique with a tool like the e.l.f. Putty Blush Brush to press the product into the skin for a seamless, skin-like finish. Powder blushes should be applied over set foundation.

Don’t hang blush solely on the cheeks. A subtle sweep across the bridge of the nose and a dab on the chin ties the color together for a perfect, sun-kissed application. This artist-approved method, often highlighted by Byrdie, creates cohesion without obvious contouring.
Choose your shade intensity based on placement. Deeper tones work well on the cheekbones for a structured effect, while lighter, brighter pops are perfect for the apples. The key is to build color gradually; it’s easier to add more than to subtract.
The Angled Brush: Sculpt & Define
Choose an angled brush for precise placement and controlled blending, especially with powder formulas. Its slanted, often dense bristles deposit product exactly where you intend, making it perfect for sculpting cheekbones or creating a lifted effect.
This shape excels with different blush types:
- Powder Blushes: The flat edge picks up product efficiently for targeted application.
- Cream & Liquid Formulas: A synthetic-haired angled brush, like the Real Techniques Sculpting Brush, seamlessly blends these products without streaking.
Application technique matters. For a sharp contour, use the narrowest edge. For a softer finish, apply with the broader side or use circular motions. Vincent Ford, a top pro, might love this tool to add a hint of color just below a highlighter for multidimensional structure.
Key benefit: it defines your face’s architecture. Target the hollows of cheeks, blending upward toward temples. You can also use it to apply a touch of product across the bridge of the nose for a sun-kissed, natural flush.
Consider the Sigma Beauty F10 Powder/Blush Brush for a premium option. Its angled head and firm yet soft bristles offer unmatched control. For a budget-friendly pick, the e.l.f. Cosmetics Ultimate Blending Brush performs remarkably well with all product formulas.

Defining and Lifting the Cheekbones: Step-by-Step
Start with a cream-based product, like the Rare Beauty Soft Pinch Liquid Blush, because its blendable texture seamlessly melts into your foundation.
For precise placement, locate the hollow of your cheeks by sucking them in; apply your contour or deeper blush shade just below the bone with an upward motion.
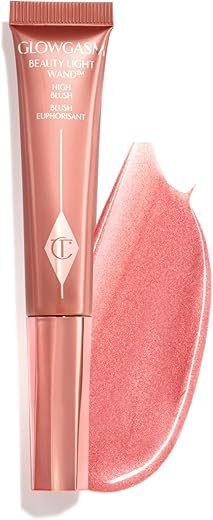
Directly on the highest point of the cheekbone, apply a lighter, luminous blush, such as the Charlotte Tilbury Beauty Light Wand, to create immediate lift.
Blend the two shades together using a tapping technique, ensuring there are no harsh lines, to shape the face with dimension.
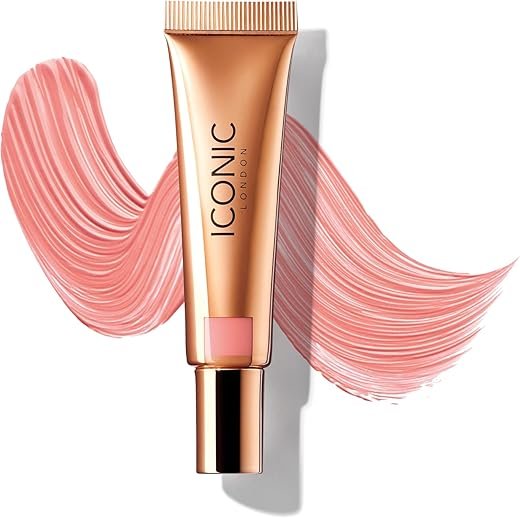
Finish by dabbing a liquid highlighter, like the Iconic London Sheer Brilliance, at the very top of the bone; this final step catches the light and completes the sculpted look.
The key benefit of this method comes from using two complementary blushes–it builds structure where you need it and adds a healthy flush to the apples of the cheeks.
Choose your shades wisely: whether you prefer a monochromatic scheme or contrasting tones, the technique remains effective for defining your natural bone structure.
Why This Shape Excels with Powder and Cream
Choose a densely packed, synthetic-domed brush for universal application. This specific construction matters because the firm, rounded bristles provide the necessary pressure to pick up and deposit cream product effectively, while their density prevents streaking.
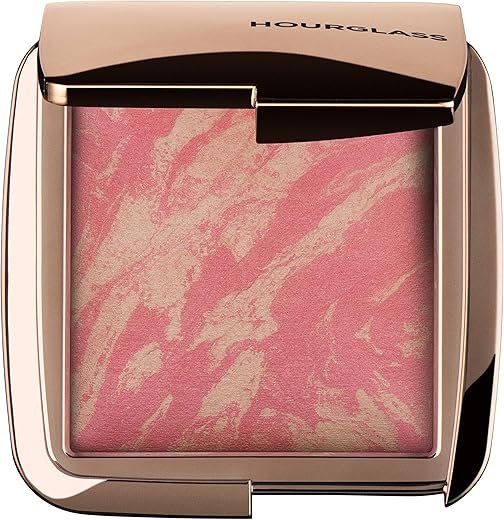
For powder formulas, this same density allows for controlled pickup, minimizing fallout. The dome shape blends product seamlessly, whether it’s a cream like the Rare Beauty Soft Pinch Liquid Blush or a powder such as the Hourglass Ambient Lighting Blush. Synthetic bristles are non-negotiable for cream application because they do not absorb product, ensuring more pigment lands on your skin.
However, the key to a dual-purpose tool is its tapered edges. Unlike other brushes with a flat top, this shape allows for precise placement on the apples of the cheeks and effortless diffusion toward the hairline. The result is a buildable, natural finish regardless of formula. Consider the Real Techniques Sculpting Brush or the Sigma Beauty F80 Flat Kabuki for this versatile application.
Avoiding Harsh Lines: The Blending Technique
Begin every cheek product application with a nearly clean tool. Whether using powder or a cream formula, load the brush minimally, then tap it firmly to dislodge excess pigment before it touches skin.
The blending motion is a non-negotiable, circular buffing action. Use the tips of the bristles in tiny circles to melt edges, never dragging or swiping in straight lines which deposit concentrated streaks of color.
For cream blush, employ a stippling method with a dense yet soft brush, like the Real Techniques Stippling Brush. Push the product into the skin, then switch to circular motions without adding more product to seamlessly marry it with your base.
Finalize with a dedicated clean, fluffy brush. A tool such as the Sigma Beauty E40 Tapered Blending Brush is perfect for this final step, ensuring zero harsh lines between your blush, contouring, and foundation.

| Common Mistake | Pro Correction |
|---|---|
| Applying too much product at once | Build color in thin, translucent layers |
| Using a dirty or overly loaded brush | Always start with a tapped-off brush |
| Dragging the brush downward | Blend upward and outward toward the hairline |
| Skipping the final blend | Use a clean, powder-free brush to diffuse edges |
Remember, the tool matters less than the technique. Even the best brush, like the iconic Sonia G. Face Pro, cannot fix a heavy-handed start. The true artistry lies in the invisible finish.
Question-Answer:
I have a small, round blush brush that came with a set. Is it okay to use, or do I really need a different shape?
It’s fine to start with, but the shape makes a big difference in application. A small, round brush concentrates color in one spot, which can look doll-like or artificial. For a more natural, diffused flush, a brush with angled or tapered bristles is better. These shapes fit the curve of your cheekbone and help blend the edges seamlessly. Think of your round brush for precise placement, but consider an angled brush for a softer, everyday look.
My blush always looks too streaky or harsh. Could the brush be the problem?
Yes, the brush is likely a key factor. Streaks often come from brushes that are too dense or have synthetic bristles that don’t blend powder well. A brush with natural hair fibers or a mix of natural and synthetic will pick up less product and blend it more softly into the skin. Also, try a brush with a slightly domed or fluffier head instead of a flat, packed one. Always tap off excess powder before applying and use light, circular motions to blend out any hard lines.
What’s the actual difference between a cheap drugstore blush brush and a more expensive one? Is the price worth it?
The main differences are in the hair quality, construction, and longevity. A cheaper brush might shed hairs, feel scratchy on the skin, or lose its shape after washes. This can affect how smoothly the blush applies. A higher-quality brush uses softer, better-cut fibers that hold their shape, pick up the right amount of product, and distribute it evenly. It’s an investment that can improve your application and last for years with proper care. You don’t need the most expensive, but a mid-range brush from a reputable brand often shows a clear improvement.
I use cream blush. Do I need a special brush, or can I use my fingers?
Fingers work, but a brush gives a more polished finish. For cream blush, avoid dense powder brushes. Look for a synthetic brush with a flat, slightly tapered shape or a stippling brush with duo-fiber bristles (black tips with white bases). Synthetic fibers don’t absorb the cream product like natural hair can. The stippling brush is excellent because it deposits color lightly and blends it into the skin without moving your foundation underneath. It helps achieve a sheer, skin-like finish that’s hard to get with fingers alone.
How do I clean my blush brush, and how often should I do it?
Clean your blush brush about once a week if you use it daily. Buildup of old product and oils can make application patchy and harbor bacteria. Use a gentle shampoo or brush cleanser. Wet the bristles, apply a small amount of cleanser, and massage it in your palm under lukewarm water. Rinse until the water runs clear. Never soak the ferrule (the metal part) as glue can loosen. Reshape the bristles and lay the brush flat on a towel to dry. Regular cleaning keeps your brush performing well and is good for your skin.
I have a small, flat brush that came with my blush. Is it okay to use, or should I invest in a different one?
The brush that comes with a blush is often designed more for compact portability than for optimal application. These brushes are typically quite dense and small, which can lead to a concentrated, stripe-like effect that’s hard to blend. For a softer, more diffused look that mimics a natural flush, a dedicated blush brush with fluffier, tapered bristles is a much better tool. It picks up less product and blends it more seamlessly into the skin. While you can use the provided brush in a pinch, a proper blush brush will give you significantly more control and a professional finish.


No Comment! Be the first one.